I'd love to help! Granted I only played her for two matches, about to start queuing up for more with some friends, but I'd like to think I got a good feel for her.
For runes I took AS quints, AD marks, flat armor seals, and MR/level glyphs. The resistances were standard for junglers (MR/level glyphs give you more MR by level 6 than flat marks, and scale well into late game so you can put off buying MR for a bit longer) and I took the AD marks for a bit extra damage on hit while the AS quints helped get my fury meter up faster while increasing my clear speed. Given her synergy with attack speed, how it stacks her fury faster, lets her get Q enhanced autos off faster, and works well with the passive AS buff of her ult, it seemed like the best idea.
My first match I went 21/9/0 taking masteries in the normal AD lines, but found that without some early resistance my jungle was incredibly janky. It was a lucky last minute knockup on raptors that kept me from being executed. Second match I flipped it and took a more defensive route with 9/21/0 masteries and it worked a lot better. I got a leash for blue, went to wolves, then raptors and backed for the Stalker's upgrade.
You're right, I farmed for my Devourer as quick as I could but given that she can apply pressure early on I was wary for moments when I could gank lanes. I got a few early kills for my Jax so he could start snowballing and secured the enemy Kat for my Malzahar to get him started. I built the Devourer's incrementally, getting a dagger and then getting boots when I had enough gold to give my ganks some extra power before finishing Devourer. Built Mercury Treads since they had a pretty AP heavy team, then rushed for a Hydra. After that I build a Warden's Mail, rushed a Spirit Visage to increase the healing from her burrowed form, and finished the Randuin's Omen to add a bit more health and that AoE slow. I took Alacrity as boot enchant and then built a Frozen Mallet for the extra health and AD, which allowed me to be tanky enough to dive into multiple enemies while keeping them in place between the slowing smite from Stalker's, the Randuin's active, and the slow on every auto attack from Frozen Mallet. It worked out pretty well, although they started focusing me and I found out that even with resistances built Rek still gets rekt pretty badly if she gets locked down.
While jungling I prioritized Q, then E, then W. While her Q's cooldown doesn't decrease with levels, the damage increases pretty solidly. E's damage is meh early on because it deals a percentage of your AD in true damage. Early on you don't have much AD, so it's best saved for later once you've finished a Hydra. At max rank it'll give you 240% of your AD in true damage. If you have about 240 AD, which is where I ended up, you're effectively dealing over 500 true damage off her E with full fury. Max W last because the cooldown is the same across all levels, and the length of the knockup, or the time until they can be knocked up again, doesn't decrease with level.
Fighter is my native role, it's the one I'm most comfortable with. Playing champions like Shyvana, Skarner, or Wukong gives you a good feel for the sort of guerilla tactics that you can use to weaken someone before going all in to finish the job, and I applied a lot of what I know from them to Rek'Sai. I was neither the primary tank nor the primary damage dealer, so it was my job to be more disruptive than anything else.
Her tremor sense is probably her biggest asset. It allowed me to track nearby enemies and skirt around them, pinging their locations out to teammates to help everyone maneuver into position to shut them down. It helped out tons with her counterjungling as I could cruise through the enemy jungle slowly and watch for when blips started showing up, avoiding areas where wards were likely to be. I found that in most cases her tremor sense seemed to be farther reaching than standard vision so if I took it methodically I could see someone coming before they saw me. Then it was a matter of waiting nearby until I saw someone trying to take a camp, give it a few moments to let them get weak, before firing Q through the wall and rushing under it with E, popping up and lashing out with Q. It builds fury more for every enemy hit, so with the camp still up you get a solid amount of fury fairly quickly to use to fight the enemy jungler, or the laner that was trying to take a camp. The enhanced smite could be used either to steal the large monster or to slow the escaping enemy to finish them off with E. When it came to fighting them for their red/blue buffs I would actually let them smite it that way I have both my E and smite up to kill them instead of burning one or the other on a buff. This allowed me to get both the buff and the kill in most cases.
For tunnels I found that a lot of the best places were the backside of buff camps, where the walls meet for red and blue buffs, things like that. Try and place them so that the first opening is on the side of the buff walls that don't have a bush on the edge, and the exit tunnel somewhere near the middle back of it. This allowed me to get in easy from an angle that wasn't likely to be warded, take out the enemy, and escape in a direction that would quickly make them lose vision of me afterwards. Dragon and Baron pits I tunneled with one end in the bushes nearby and the other near the backside of their pits. In my own jungle I left tunnels near high traffic areas that gave me access if someone tried to invade my jungle, and after pushing the outer turrets and getting a solid foothold in the enemy's jungle I started leaving them in places that they wouldn't be found easily by just walking around casually. I tried to always keep one side in a bush unless I had to escape from someone or several someones who were chasing me.
When ganking try and come around the long way whenever possible. You want to cut off their escape route, cut across the lane in front of them to trap them between you and your team. Knock them up, trying to hit them near the center so that they're knocked up for longer. If they attempt to flash, dig in the same direction; your tunnel length is farther than flash will take them, so you can stay on them even after they've burnt flash. If you can stay on them without having to burn a tunnel, you can pretty safely towerdive with it. Follow them, get the kill, and then tunnel over the nearest wall, or simply in any direction far enough to get out of turret range, and you're golden.
When teamfights started I needed to pick my entries carefully, watching for when they used up crowd control on allies and rushing in afterwards, when they couldn't stop me or deal quite as much damage from burning other spells already, and focused the carries first. Rek'Sai's tunneling, her speed in general, makes getting around a team's defensive line to their carries insanely easy, but don't try and do it without your team at the ready. Good players will see you getting into position and pop as many abilities as they can at the enemy to weaken or CC them so that when you pop up you can go to town.
Her Q resets her auto attack timer, so use it immediately after getting your first auto attack in and you'll increase your burst. I found that each cleave would apply the on hit effect from Devourer's to every enemy that I hit, so I had significant AoE damage from my Q's bonus damage and the Devourer's on hit damage (which from constant counter jungling as well as clearing my own camps was stacked through the roof), and the target of your auto attack gets the cleave passive from Hydra. After burning your Q's three hits, do another auto attack and then quickly activate Hydra, which provides a higher burst of damage and also resets her for a third auto attack. By then, if your Q's have been hitting more than one person, you should be either at or very near max fury, so hit your E as soon as you can to deal that sweet, sweet true damage, and if it isn't enough you've got smite at hand to slow their getaway and deal a little extra damage. By the time I had max ranks in her E my attack speed was already pretty high so I'm not sure if it resets the auto attack animation or not, but it's increasing your burst either way.
There is nothing quite as sweet as smiting a Hecarim who tries to ult over a wall to escape your wrath.
When using her ult I actually used it for both purposes you mentioned. With the enemy on the defensive, and my tunnels covering most of their jungle pretty well as well as both objectives, I was able to go where I was needed the most for teamfights in jungles, get into position to dig under walls into lanes if they were happening there, and when pushing I could get a lane shoved up to their turret, take it if possible, and back away to ult to another lane to push that one up as well. Once I started getting focused down a lot more I could use it to get back to the other side of the map within moments of reviving.
I was always, always, always working with my team whenever possible. It helped that the people I were playing with were actually really good players with solid communication skills. They seemed to know that if I stopped moving in a bush it was because I was seeing someone, and a few times I would warn them not to head out of a bush we were hiding in until I gave the mark with my Q to dive in. Remember that you have a way of seeing enemies that your teammates can benefit from greatly if you show them that you can use it well. Hitting someone from afar with Q before rushing in with your tunnel allows you to get a knockup before they have time to react to your presence, and gives an ally that you have with you time to unload on them. When teamfights broke out in the jungle I would use the same tactics as during regular lanes, but with the added strategy of ducking in and out of the fight as I needed. Several times they would be about to kill me, attempting to focus me down even with my teammates in the fight, and when I got away they had already burnt most of their abilities on me and so my team was able to swab them up. After a few moments, healing while in burrowed form, I could reenter the fight wi

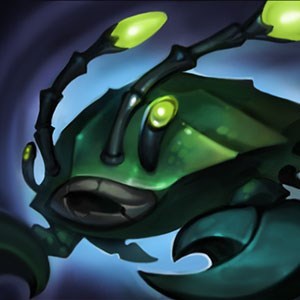




 that's one sexy gal





 should be remove really it just sometime way too good.
Thinking about you
 and
 Wait dont get me wrong she nice and fiora is my favorite champ but i really dont like this item.
 if it was not a joke you dont know what it dose but i just hope it was a joke because it for melee so ...
Well i am not saying it a bad item for other champ but really i dont see the use of this item on malphite poppy shaco sion jax master yi lee j4 wukong kha'zix and shyvana